Using shade measurement with your TRIOS intraoral scanner
3Shape TRIOS automatically measures and records teeth shades when you take a digital impression. A terrific time saving step that means you no longer need to use shade guides in your workflow.
To capture teeth shades automatically while you scan, you need:
- 3Shape TRIOS shade-enabled intraoral scanner
- TRIOS 2014 software update - 1.3.2.0 (or later)
- TRIOS Color Calibration Kit
How to check if your TRIOS scanner is shade enabled and if you are running the correct software
To check if your TRIOS scanner is shade enabled, just go to Configure/General section and locate the field named ‘About/Scanner in the top right corner. Here you will find details about the software, which should be 1.3.2.1 (at the top of the list) and the Scanner model, which should be TRIOS Color-P13 Shade (at the bottom of the list).
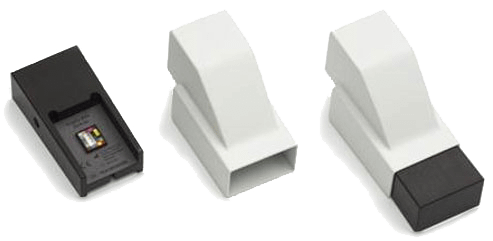
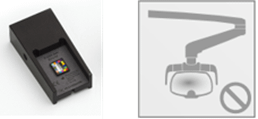
Youll also need a color calibration kit. The color calibration kit consists of a white piece - mounted on the TRIOS tip and a black box with a color pattern on one side and a grey square on the other side.
If you are missing any of the above, please contact your reseller.
5 simple steps to taking a digital impression with shade measurement
|
|
|
|
|
|
|
|
|
|
|
|
|
|
|
Three scan strategies
In many cases, you will need to measure the shade of the tooth next to the preparation. Scanning a tooth for shades requires a bit more scanning than usual, and it is therefore likely that some of the shade scanning will also include the preparation. It is important to make sure that this excess scan information does not add collapsed gingiva onto the preparation scan, because this could potentially compromise the margin line. Use one of the following three scan strategies to avoid affecting your margin line capture.
Scan strategy #1: Scan preparation first, and then lock the margin line
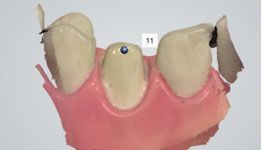
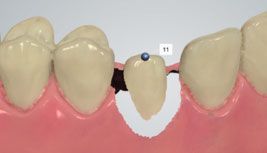
Take out the retraction cord and scan the preparation. Then lock the margin using the lock tool. This will ensure that the margin area remains unaffected as you continue scanning
|
|
Step 1: Remove the retraction cord and scan the preparation immediately |
|
|
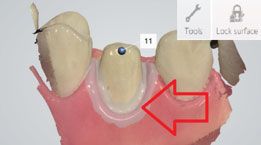
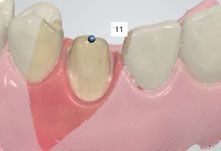
Step 2: Lock the margin, using the Lock surface tool. (paint the area around the margin). Press the ‘Tools button (on the tool bar) to access the Lock surface tool |
|
|
Step 3: Scan the rest of the arch |
|
|
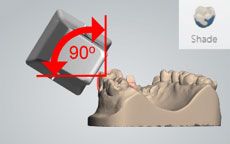
Step 4: Select the Shade icon (on the right side of the screen). |
|
|
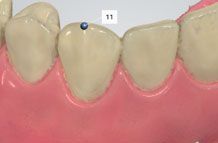
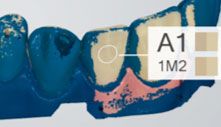
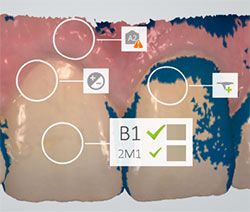
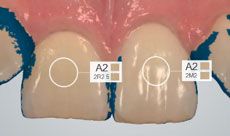
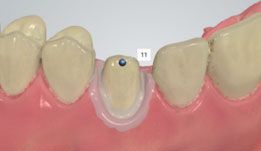
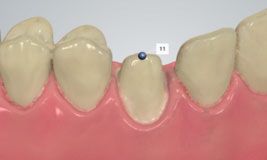
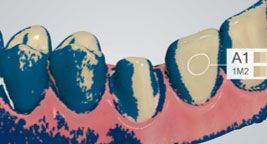
Step 5: Place your shade measurement circle |

Scan strategy #2: Scan margin as the last thing you scan
Scan the arch first. Then scan for shades on the neighboring tooth and trim away the margin. Finally take out the retraction cord and scan the margin.
|
|
Step 1: Scan the arch with the retraction cord in place |
|
|
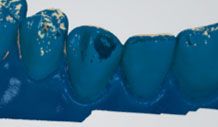
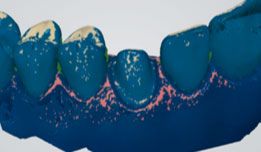
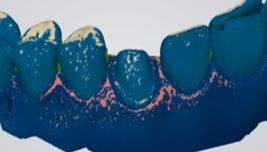
Step 2: Select the Shade icon (on the right side of the screen). A blue overlay will appear where the scan quality is not sufficient for getting shade measurements. Scan the tooth you want to measure for shades until the blue overlay clears |
|
|
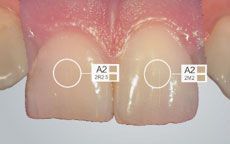
Step 3: Place your shade measurement circle |
|
|
Step 4: Trim away the margin |
|
|
Step 5: Remove the retraction cord and immediately scan the margin |

Scan strategy #3: Use a pre-preparation scan
Scan the shades on the pre-preparation scan. Then scan the preparation.
|
|
Step 1: On the order form, select the option to add a pre-preparation scan |
|
|
Step 2: Go to the pre-preparation scan page and scan the arch |
|
|
Step 3: Select the Shade icon (on the right side of the screen). A blue overlay will appear where the scan quality is not sufficient for getting shade measurements. Scan the tooth you want to measure for shades until the blue overlay clears |
|
|
Step 4: Place your shade measurement circle on the pre-preparation scan |
 |
Step 5: Go to preparation scan page and scan the preparation only |